This tutorial will show you how to create a section drawing and position a plot within it.
See Tutorial #1 and Tutorial #6 for similar projects.
Note: This tutorial was written using v2.8.2 of Metes and Bounds. If you are using a newer version, your screenshots may vary. But the basic functionality should be the same. Also, this tutorial assumes that are using a registered Pro version. If you are using the Basic or Unregistered version, not all of these features will be available.
This is the plot description that we will be using for this tutorial:
Commence at the Northeast corner of the Northwest Quarter of Section 8, Township 17 North, Range 4 East; proceed South 0141'38" East along the East line of said Northwest Quarter, a distance of 798.60 feet; thence proceed South 8343'20" West, a distance of 764.81 feet; thence proceed South 0152'55" East, a distance of 500 feet; thence proceed South 8343'20" West, a distance of 425 feet to the Point of Beginning; thence proceed South 0152'55" East, a distance of 292.47 feet; thence proceed South 8343"20' West, a distance of 529.47 feet; thence proceed North 0001"13' West, a distance of 1104.92 feet; thence proceed North 8325'00" East, a distance of 344.99 feet; thence proceed South 0001'13" East, a distance of 812.30 feet; thence proceed North 8343'20" East, a distance of 175.00 feet to the Point of Beginning
Creating the Section Drawing
-
To create a new drawing, choose New Drawing from the File menu.
-
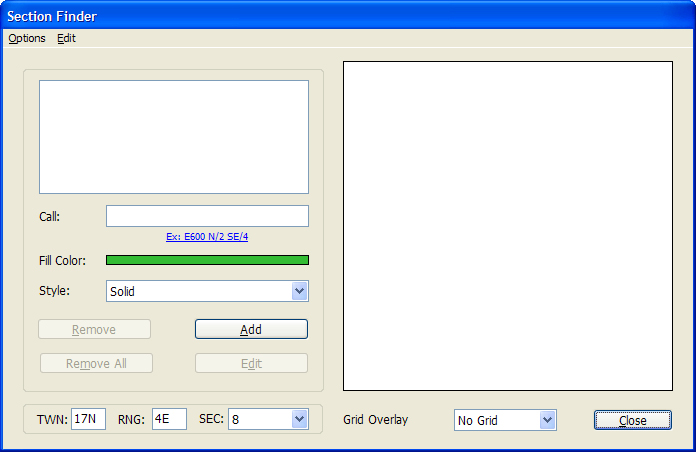
On the Drawing Tab, press the Section Finder button. This will bring up the Section Finder.
-
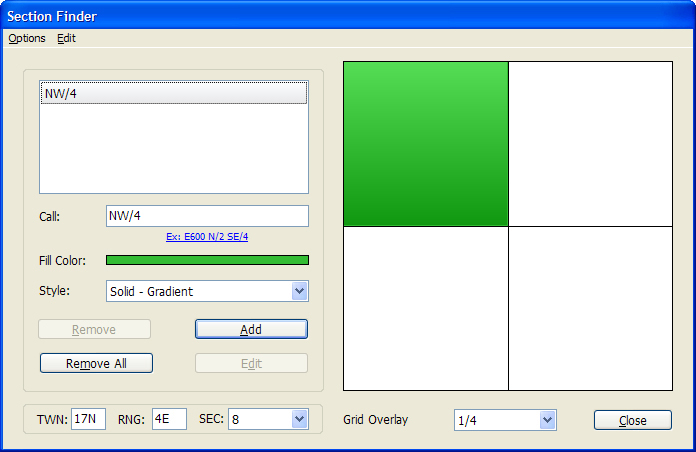
From the plot description above, we know that we are interested in the northwest quarter of the section, so enter "NW/4" in the call field. Choose 'Solid - Gradient' from the style popup menu. Press the Add button to add our call to the drawing. Now, choose 1/4 from the Grid Overlay popup menu. Your Section Finder window should now look something like this:
-
To use this section drawing as the background for our main plot drawing, choose Set Picture as Background from the Options menu.
-
Press the Close button to exit from the Section Finder.
Setting up the Background Picture
At this point your section picture should be filling the entire drawing area. Now we need to tell it what scale to draw the picture at and where to position the picture.
-
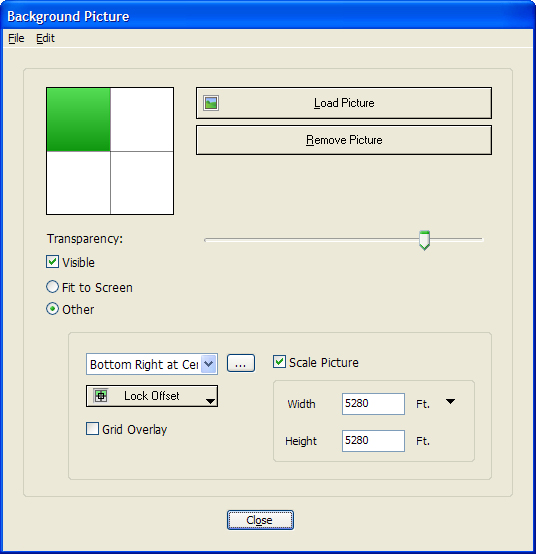
To start, press the Background Picture button on the Drawing tab.
-
Select the "Other" radio button.
-
Choose Bottom Right at Center from the positioning popup menu.
-
Verify that the Scale Picture checkbox is checked and that the width and height are set to 5280 feet (1 mile).
-
Choose Layer 0 from the Lock Offset menu. This locks the backgrounds offset to Layer 0's offset. This way, if we drag the layer via the mouse later, the background picture will move with it.
-
Press the Close button.
The background drawing should now be scaled as 1 mile and the bottom, right-hand corner should be in the center of the drawing area. At the default drawing scale (1" - 72'), this will probably look like two lines meeting in the center.
Setting the Drawings Scale and Origin
-
To set the drawings scale, click on the scale popup menu triangle on the Drawing Tab and choose 1" = 1000'. You can also set the scale by choosing Set Scale from the Tools menu.
-
Set the Origin to Center - which is different than "Auto Center". This will cause the software to start drawing the plot in the center of the screen - same as the background picture.
Entering Plot Data
The first thing we want to do is tell the software where to start drawing the plot data in relationship to the origin that we set for the drawing. According to the plot description, our plot data starts "at the Northeast corner of the Northwest Quarter". We set our background picture so that the bottom, right-hand corner shares the point as our drawing origin. We will use this information to create the first line for our drawing. This first line will get us from our section's chosen origin to the plot description's starting point within the section.
-
Open the Data Entry form by pressing the Data Entry Form button.
-
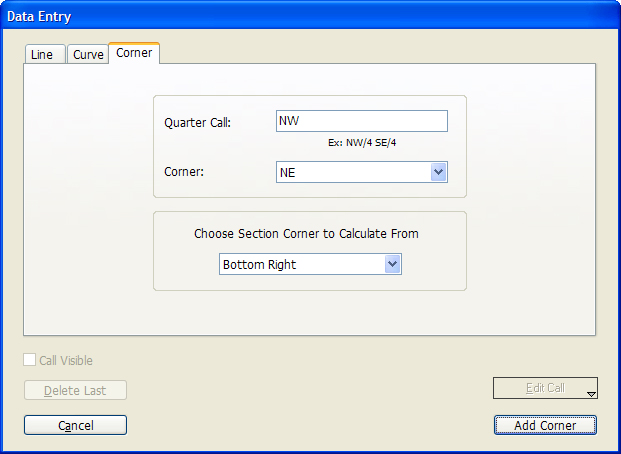
Choose the Corner tab.
-
We know from our plot description that we want the Northwest Quarter and the Northeast corner. We know from our background picture setting that we want to start at the Bottom Right. Enter this information and press the Add Corner button. This will create an invisible line that will take us from our starting point (the bottom right of the section) to the Northeast corner of the Northwest section.
-
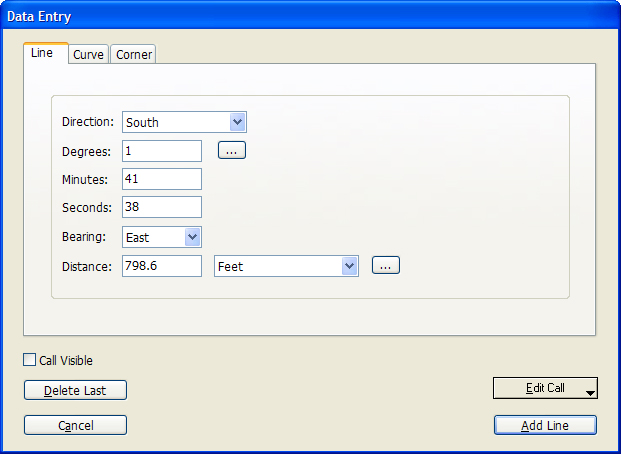
Now choose the Line tab. We will now enter the calls from our section corner to the plots POB. Make sure that the Call Visible checkbox is not checked as we do not want these calls to be drawn as part of our plot.
-
Calls to Plot POB
-
South 141'38" East 798.6 Feet
-
South 8343'20" West 764.81 Feet
-
South 0152'55" East 500 Feet
-
South 8343'20" West 425 Feet
-
-
-
Now make sure that the Call Visible checkbox is checked. We are about to start entering the calls for our plot, so we want these lines to be visible.
-
Plot Calls
-
South 0152'55" East 292.47 Feet
-
South 8343"20' West 529.47 Feet
-
North 0001"13' West 1104.92 Feet
-
North 8325'00" East 344.99 Feet
-
South 0001'13" East 812.30 Feet
-
North 8343'20" East 175.00 Feet
-
-
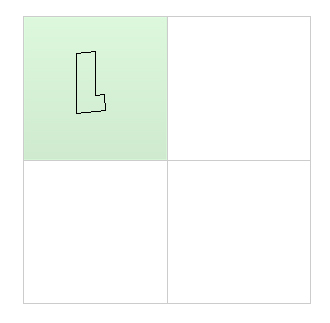
Press the Done button to close the Data Entry form. Your drawing should now look like this: